In this article, you will learn how to configure your email account in Gmail using the POP protocol. Follow the steps below to complete the setup.
1. Open Gmail.
2. Click the Settings (gear) icon in the top-right corner of the screen.
.png)
3. Select “See all settings.”
.png)
4. Go to the “Accounts and Import” tab.
.png)
5. Scroll down until you find the option “Check mail from other accounts.” and click on “Add a mail account.”
.png)
6. A popup window will appear. Enter the email address you want to configure, then click Next.
.png)
7. Select “Import emails from my other account (POP3)” and click Next.
.png)
8. Enter the required details: Username, Password, POP Server: mail.yourdomain.com (or mail.domainname.com), 995 – POP3 with SSL, 110 – POP3 without SSL, Leave a copy of retrieved messages on the server (if you want to keep emails on the server), If choose 995 and then choose always use secure SSL connection, select email in label incoming messages. After entering the details, click Add Account.
.png)
9. Gmail will ask if you want to send emails using this address. Select Yes and click Next.
.png)
10. Enter the name you want recipients to see when you send emails, then click Next Step.
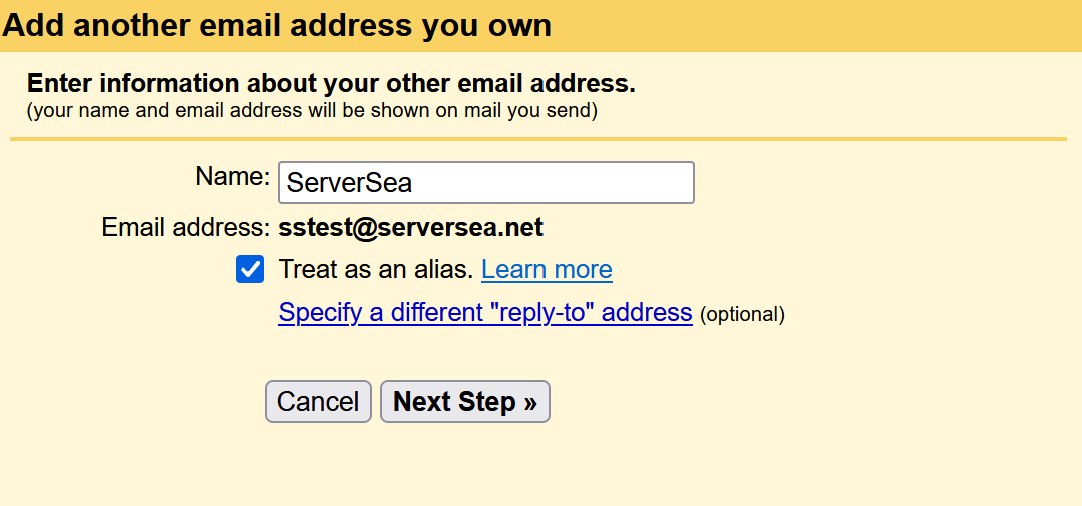
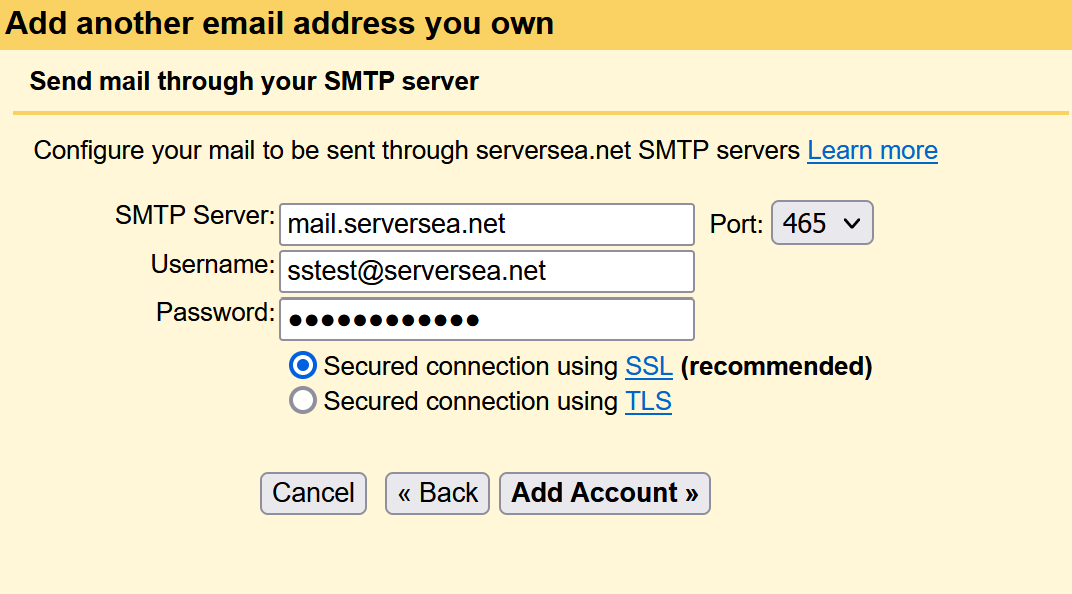
11. Enter the SMTP (Outgoing Mail Server) settings, SMTP Server: mail.yourdomain.com, username, your email password. Choose the correct SMTP port: 465 – SMTP with SSL, 25 – SMTP without SSL and Click Add Account.
12. Gmail will send a verification code to your email address. Open your email, copy the code, and enter it in the verification window.
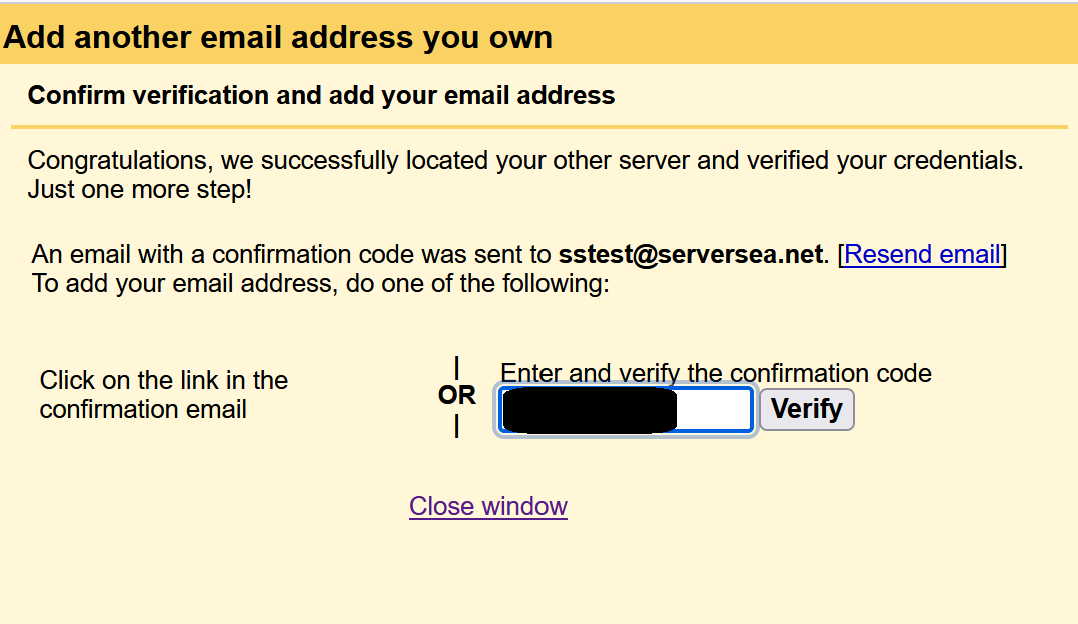
Once the code is verified, your email account will be successfully configured in Gmail using POP.